Clinical Photos and X-rays
Taking Clinical Photos
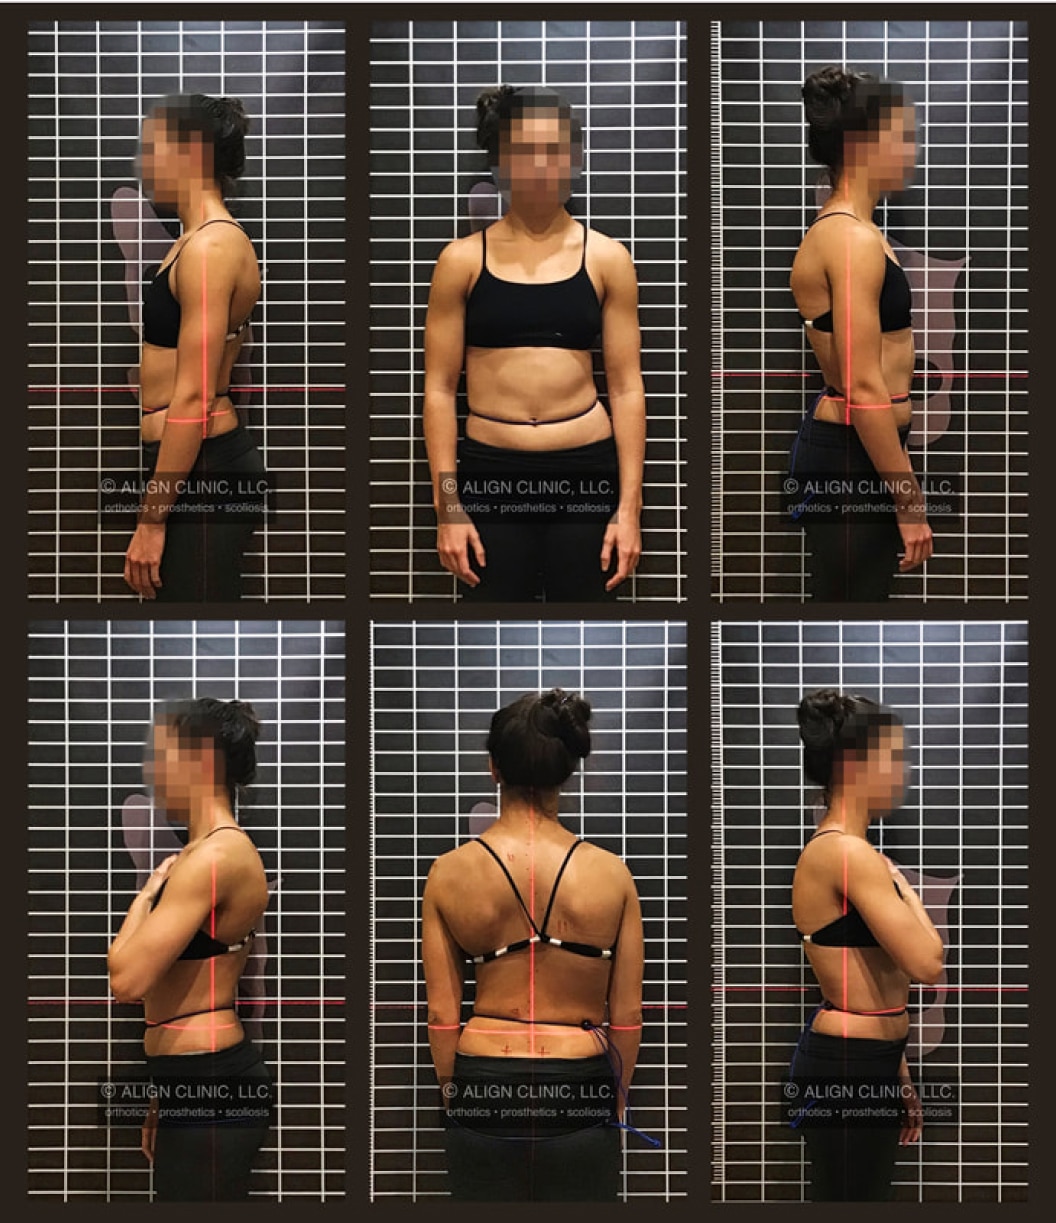
- Take photos against a plain backdrop/empty wall. (Grid, laser line and waist string are not required)
- Have the patient wear something that will still show the entire back/spine and hips clearly, such as an open back bathing suit or a bra with a very narrow strap.
- Pants/shorts need to be snug so the outline of the torso and hips is clearly visible (no baggy or bunched up clothing).
- Pictures should be taken to include at least the ear level to the ends of the fingertips.
- Take photos of the patient’s front (the face can be left out), right side, left side, and back, with arms hanging loosely at the side.
- Take two additional photos with the arm across the chest so the side of the body is visible.
- Please ensure the photos are a high resolution (3MB or higher), not blurry and have good lighting.
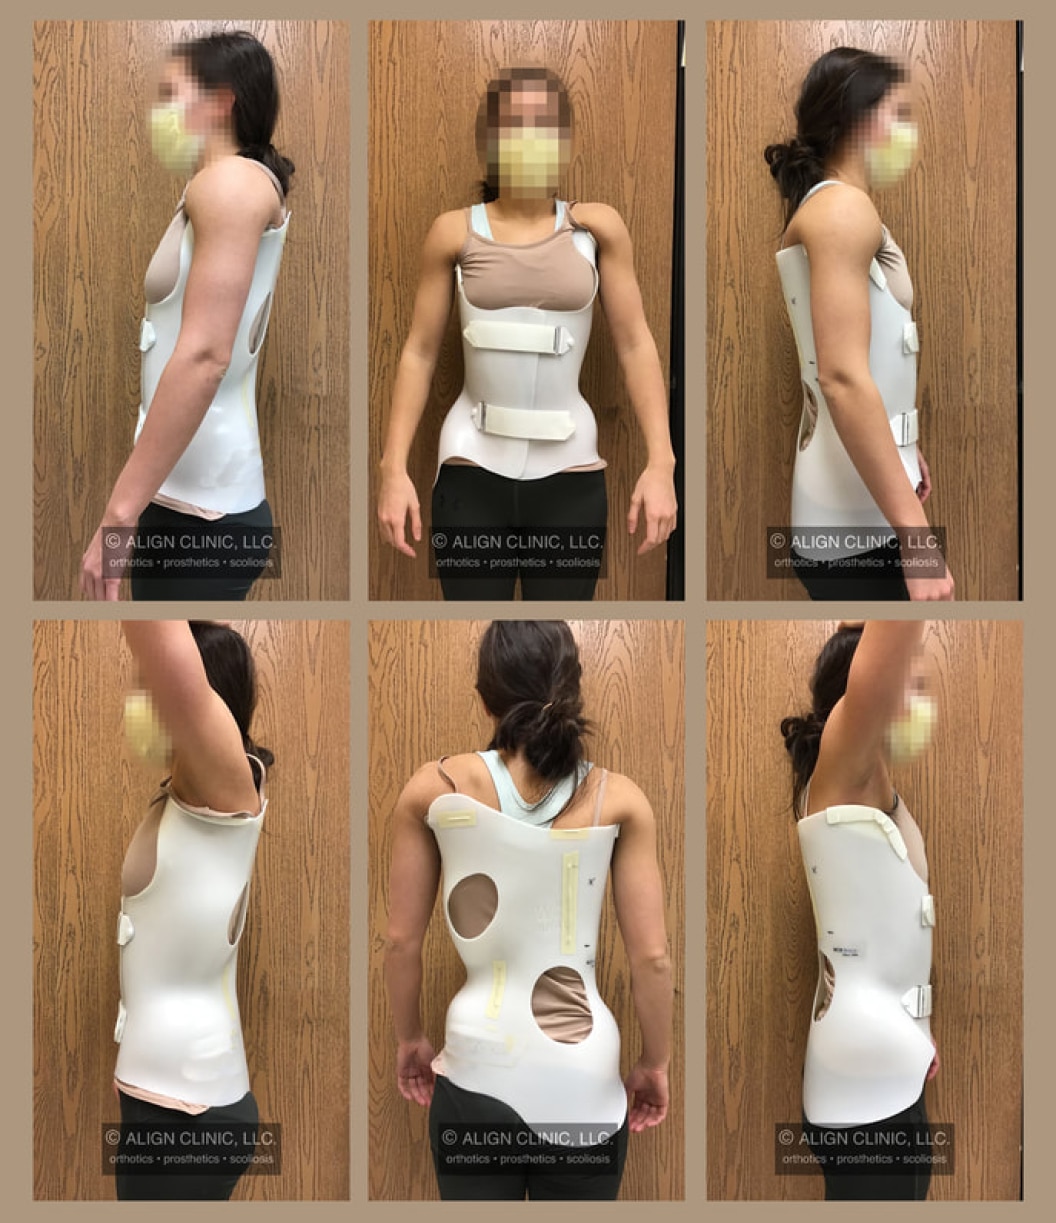
Example of a Clinical Photo Set
Saving X-rays from a CD on Windows
- Installing the viewing software Go to http://www.microdicom.com/downloads.html
- Find the first link under “Portable zip package” (underlined to the right. It’s ok if the version number is different)
Installation package:
MicroDicom DICOM viewer 4.0.0 x86 (4.26 MB 2021-11-11)
MicroDicom DICOM viewer 4.0.0 x64 (4.79 MB 2021-11-11)
Portable zip package(no installation required):
MicroDicom DICOM viewer 4.0.0 x86 zip (4.93 MB 2021-11-11)
MicroDicom DICOM viewer 4.0.0 x64 zip (5.64 MB 2021-11-11)
Autorun package for CD/DVD/USB:
MicroDicom DICOM viewer CD/DVD 4.0.0 (10.50 MB 2021-11-11)
macOS wine installer package:
MicroDicom DICOM viewer macOS wine package (7.45 MB 2021-11-11)
- Right click and in the menu click “Save As”.
- Choose where you want to save the file. If unsure, just use your desktop.
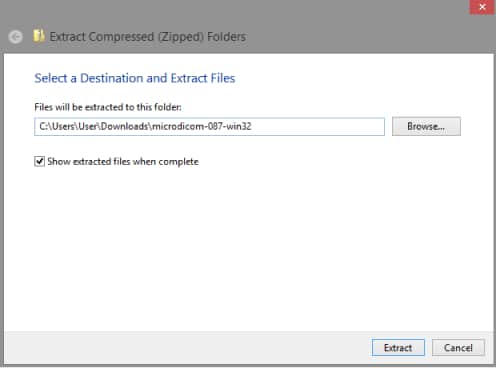
- When it finishes, right click on the file and select “Extract all…”.
- Click “Extract” on the box that pops up.
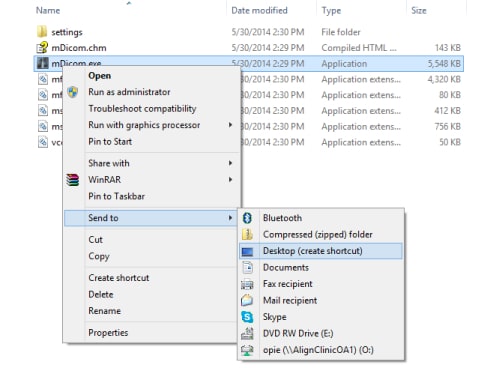
- Right click “mDicom.exe” and select “Send to” and then “Desktop (as shortcut)”.
Viewing and saving the X-rays
- Insert the CD into your computer.
- Close/ignore any programs the CD starts.
- Open mDicom.exe Click the CD icon in the upper left (in-between the open folder and search icons).
- Click Flie > Export > To a picture file.
- Next to “Destination” ADD the patient’s name AFTER the last backslash.
- “Select source” should be set to “All patients”.
- Image format should be set to PNG or JPG.
- The box for “Create sub-folders for Patient, Study, Series” should be unchecked.
- The box for “Annotations” should be checked and “All overlay” should be selected.
- Click “Export”.
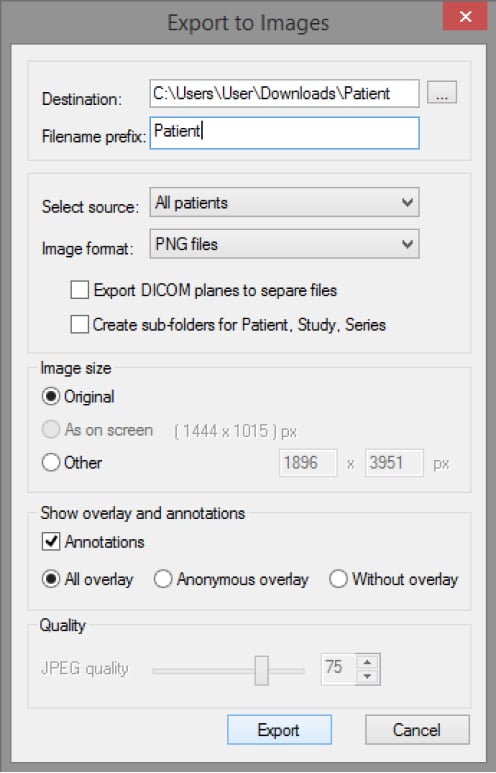
The final box should look like this
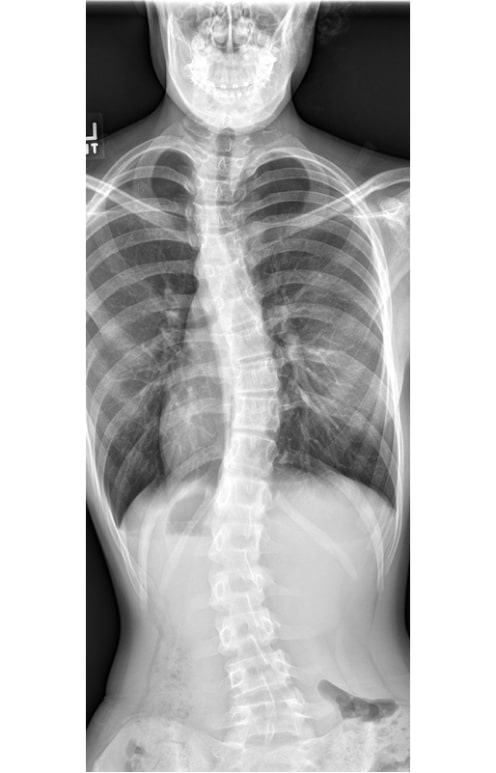
Your X-ray(s) should look something like this. It will still have the patient’s information, which was cropped here for privacy.


